Writing figures properly is one of the most important skills for young mathematicians. Most often we don’t spend enough time on writing figures. It leads to easy mistakes in calculation and therefore, we get an incorrect answer after concluding a task or an example. That’s why teachers give us lower notes. In this lesson, we’ll teach you how to write each figure and as usual we start from a zero.
Writing figures from 0 to 9
In order to train writing figures you will need sheets with cells. That is how you can see the limits of each figure and won’t overpass the cell. Below you will see graphic schemes for each figure, each line shows the starting point and the direction of writing. Lines should be drawn with the pen close to the sheet. After each graphic scheme, you can download and print a template-cheat sheet and practice writing numbers on paper.
Let’s write figure 0 properly
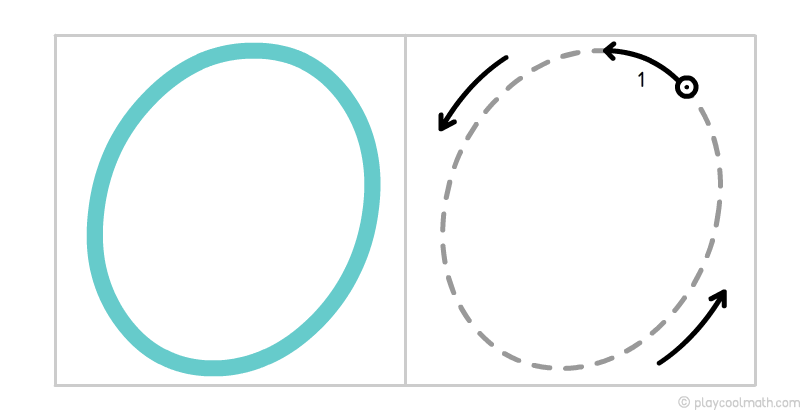
Writing a zero can be very simple. This is a common oval form. A zero is written in one touch. Let’s draw a line in a circle from the starting point to the final point, counterclockwise. Now we have a zero ready. Download and print the template and practice drawing zeros on paper.
Let’s write figure 1 properly
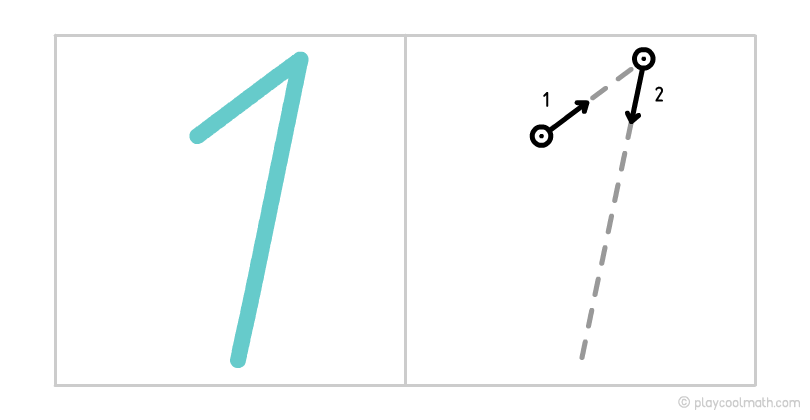
One looks like a stick with a small hook. You should write figure 1 starting from the hook, by entering the line from the left to the right up and then drawing the second line down. Download and print the template for figure 1. Practise drawing figure 1 on paper..
Let’s write figure 2 properly
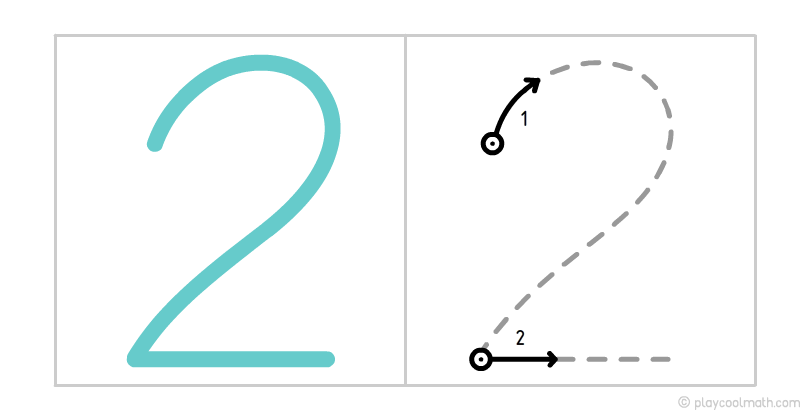
Two looks like a swan with a long neck. Let’s draw the arc clockwise up to the bottom and then draw the bottom as a horizontal line from left to right. Practice drawing figure 2 on paper..
Let’s write figure 3 properly
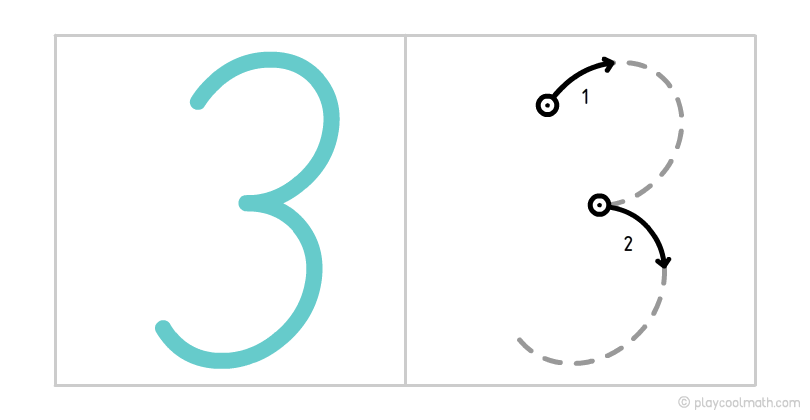
Number 3 consists of three semicircles. Let's start writing the figure from the upper semicircle. Enter the line clockwise to the middle and then to the bottom in the same way. Practice drawing figure 3 on paper..
Let’s write figure 4 properly
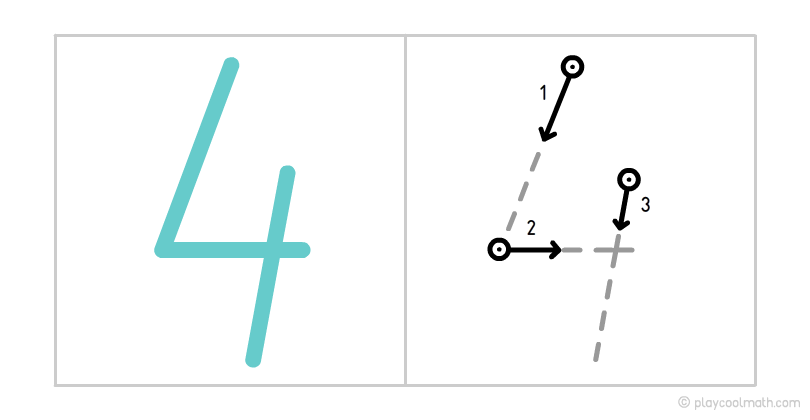
The figure 4 consists of three 3 sticks, two of them are written at one touch. At the end, an almost vertical stick is written from the top to the bottom. Practice drawing a four on paper..
Let’s write figure 5 properly
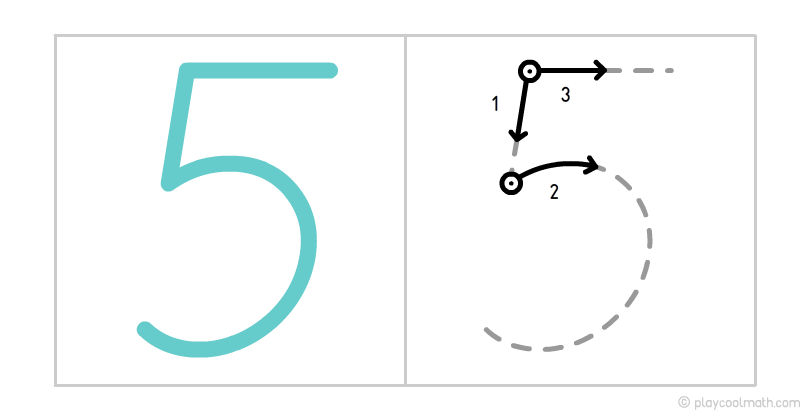
Figure 5 is one of the most difficult figures to write. It consists of a small vertical stick making a semicircle and the upper horizontal line written from left to right. Print a template for figure 5. Practice writing a five on paper..
Let’s write figure 6 properly
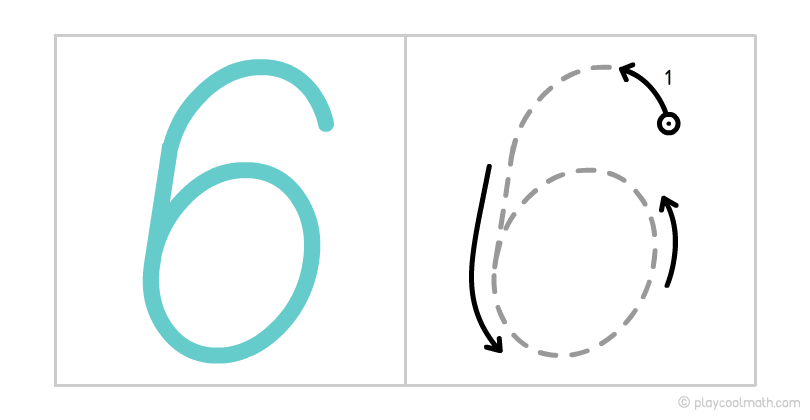
Figure 6 should be written in one arc in a counter-clockwise direction and has a small circle at the end. Practice writing a six on paper..
Let’s write figure 7 properly
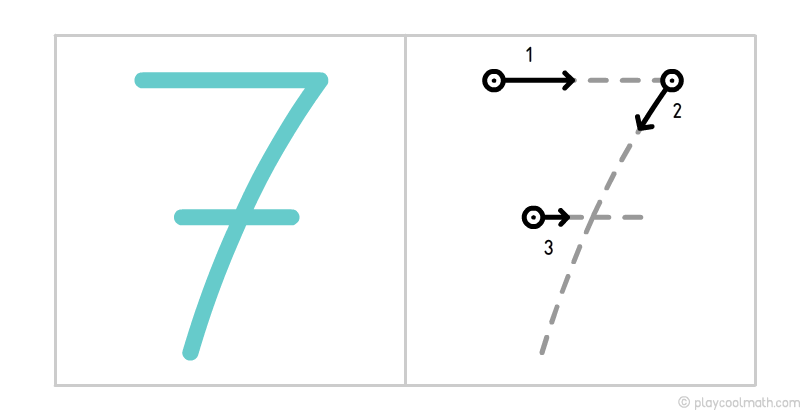
Figure 7 is similar to figure 1. If you write the top line small or inclined, you can easily confuse them. Start drawing a horizontal line from left to right and then a line to the bottom without lifting the pen from the paper. We advise you to draw a horizontal line in the center, in order not to confuse 7 with 1. Practice writing a seven on paper..
Here’s an interesting fact about figure 7. Do you know that figure 7 occurs in our life very often, it can be called a magic number:
- We have 7 days in a week;
- The rainbow consists of 7 colors;
- There are 7 basic notes in music;
- There were 7 wonders of the world;
- The sum of the points on opposite faces in the game dice is also 7.
And what other interesting facts related to the figure of 7 do you know?
Let’s write figure 8 properly
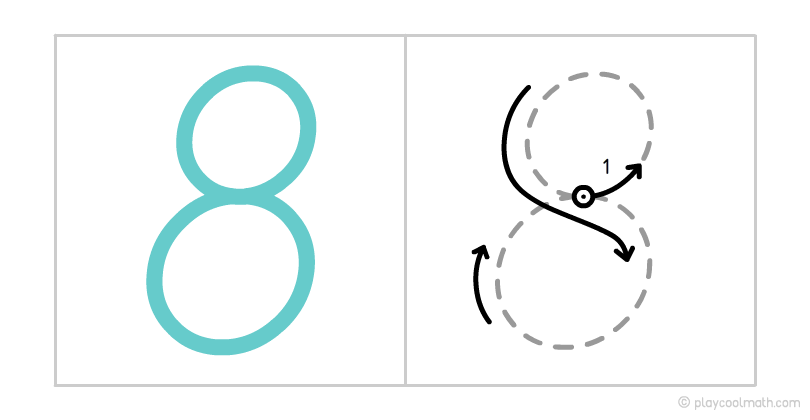
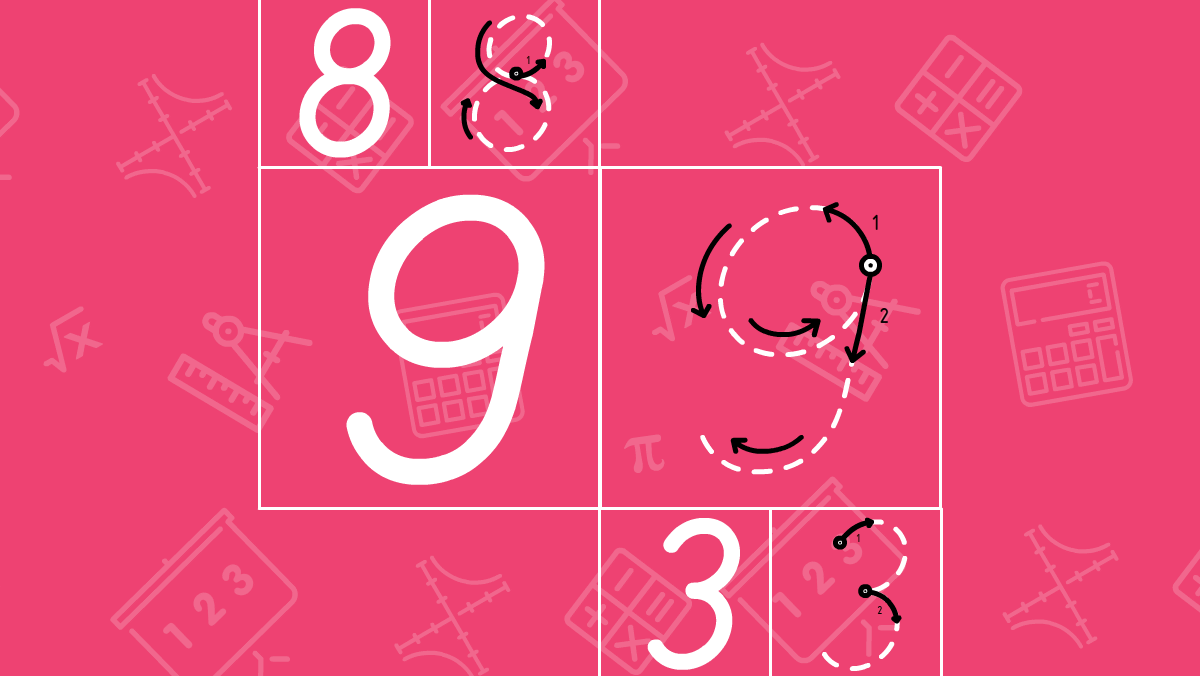
Eight can be drawn forever because the beginning and the end are the same. If you reached the end and you can draw again and do it in a circle. From the middle of the cage, we start to line up, turn counter-clockwise down to the point from the one we started. Continue drawing the line down and clockwise to the top again. Practice writing a figure on paper..
Let’s write figure 9 properly
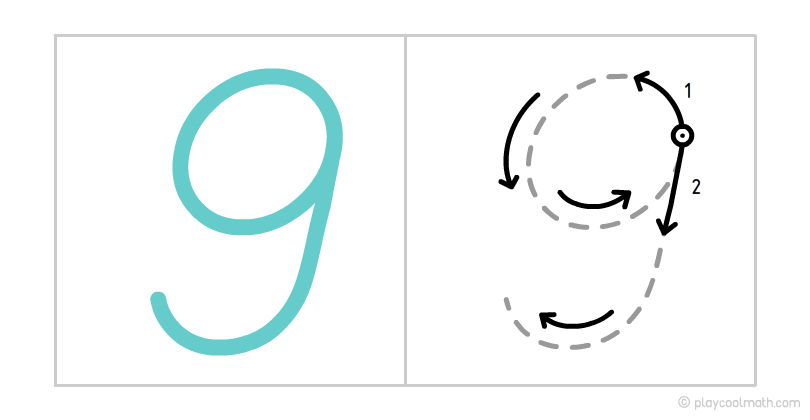
Figure 9 is like an inverted figure 6. As a start, we draw a small circle counterclockwise and then draw an arc down and to the left. Practice writing a nine on paper.
Print out the templates. Write the figures first on the contour with the help, and then continue doing it yourself. Ask your parents to say the figures aloud, meanwhile you write them down in a notebook by memory.
